
Marbled Lemon Soap Project
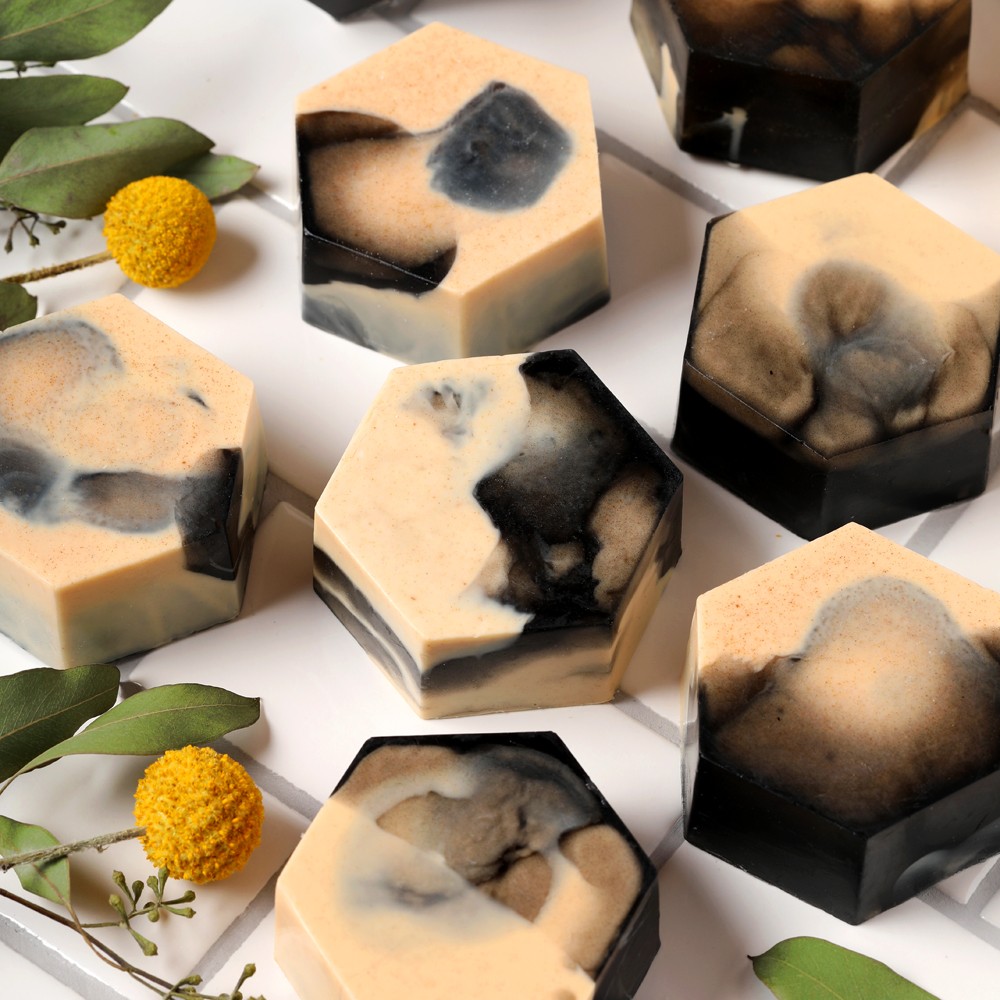
These Marbled Lemon Soaps are easy to make and they result in beautiful and unique bars each time. First, Honey and White Melt and Pour Soap Base is colored with natural activated charcoal and yellow Brazilian clay. The soap is poured into the 4 Cavity Hexagon Silicone Mold, swirling naturally as it does.
The bars are scented with fresh lemon essential oil to complement the black and yellow design. If you'd like to highlight the honey in this recipe, Raw Honeycomb Fragrance Oil would work wonderfully.
The recipe uses a full 16 ounces of both Honey and White Melt and Pour Soap Base. You can use the 4 cavity mold or the 2 cavity mold. Either way you'll have leftover soap. You can cut the recipe down or make the soap in multiple batches.
What You Need:

SFIC Honey Melt And Pour Soap Base - 1 lb

Lemon Essential Oil - 1.5 oz

Yellow Brazilian Clay - 1 oz

Activated Charcoal - 1 oz

Chamomile Extract - 1 oz

4 Cavity Hexagon Mold - 1 Mold

99% Isopropyl Alcohol - 1 bottle (16 oz by volume)

Droppers With Suction Bulb - 1 dropper

SFIC White Melt And Pour Soap Base - 1 lb
Recipe
INGREDIENTS:
- SFIC Honey Melt And Pour Soap Base - 1 lb
- Lemon Essential Oil - 1.5 oz
- Yellow Brazilian Clay - 1 oz
- Activated Charcoal - 1 oz
- Chamomile Extract - 1 oz
- SFIC White Melt And Pour Soap Base - 1 lb
EQUIPMENT:
- 4 Cavity Hexagon Mold - 1 Mold
- 99% Isopropyl Alcohol - 1 bottle (16 oz by volume)
- Droppers With Suction Bulb - 1 dropper
Instructions

You will need:
- 4 Cavity Hexagon Silicone Mold
- 16 oz. Honey Melt and Pour Soap Base
- 16 oz. White Melt and Pour Soap Base
- 1 tsp. Activated Charcoal
- 1 tsp. Yellow Brazilian Clay
- 2 Tbsp. Chamomile Extract
- 10 mL Lemon Essential Oil
- 99% Isopropyl Alcohol in a Spray Bottle
- Dropper
Follow these steps:
1
Chop 16 ounces of Honey Melt and Pour Soap Base and 16 ounces of White Melt and Pour Soap Base into small, uniform cubes. Place them into separate heat-safe containers and melt in the microwave using 30 second bursts.
2
In separate containers, mix 1 teaspoon of activated charcoal and 1 teaspoon of yellow Brazilian clay with 1 tablespoon of chamomile extract. Use a mini mixer to get rid of any clumps. Add the charcoal to the melted honey soap and the yellow Brazilian clay to the melted white soap. Thoroughly mix.
3
Add 5 mL of lemon essential oil to each container and stir thoroughly.
4
The ideal swirling temperature is between 120-130° F. Once the soap is at that temperature, carefully pour both colors into one cavity at the same time. It will naturally swirl as you pour. Continue until all the mold cavities are full and spritz the top with alcohol to get rid of bubbles. Set the remaining soap aside and allow the soap in the mold to fully cool and harden for 4-6 hours.
5
Remove each bar from the mold. Gently reheat the leftover soap in the microwave using 20 second bursts and pour it into each mold cavity. Wrap each bar in plastic wrap to prevent glycerin dew. Enjoy!
Tutorial credits
Photographer: Amanda Kerzman
Marbled Lemon Soap Project
- LEVEL Beginner
- TIME 1 hour
- YIELD About 10 bars
Project Description
These Marbled Lemon Soaps are easy to make and they result in beautiful and unique bars each time. First, Honey and White Melt and Pour Soap Base is colored with natural activated charcoal and yellow Brazilian clay. The soap is poured into the 4 Cavity Hexagon Silicone Mold, swirling naturally as it does.
The bars are scented with fresh lemon essential oil to complement the black and yellow design. If you'd like to highlight the honey in this recipe, Raw Honeycomb Fragrance Oil would work wonderfully.
The recipe uses a full 16 ounces of both Honey and White Melt and Pour Soap Base. You can use the 4 cavity mold or the 2 cavity mold. Either way you'll have leftover soap. You can cut the recipe down or make the soap in multiple batches.
You will need:
- 4 Cavity Hexagon Silicone Mold
- 16 oz. Honey Melt and Pour Soap Base
- 16 oz. White Melt and Pour Soap Base
- 1 tsp. Activated Charcoal
- 1 tsp. Yellow Brazilian Clay
- 2 Tbsp. Chamomile Extract
- 10 mL Lemon Essential Oil
- 99% Isopropyl Alcohol in a Spray Bottle
- Dropper
Follow these steps:
1
Chop 16 ounces of Honey Melt and Pour Soap Base and 16 ounces of White Melt and Pour Soap Base into small, uniform cubes. Place them into separate heat-safe containers and melt in the microwave using 30 second bursts.
2
In separate containers, mix 1 teaspoon of activated charcoal and 1 teaspoon of yellow Brazilian clay with 1 tablespoon of chamomile extract. Use a mini mixer to get rid of any clumps. Add the charcoal to the melted honey soap and the yellow Brazilian clay to the melted white soap. Thoroughly mix.
3
Add 5 mL of lemon essential oil to each container and stir thoroughly.
4
The ideal swirling temperature is between 120-130° F. Once the soap is at that temperature, carefully pour both colors into one cavity at the same time. It will naturally swirl as you pour. Continue until all the mold cavities are full and spritz the top with alcohol to get rid of bubbles. Set the remaining soap aside and allow the soap in the mold to fully cool and harden for 4-6 hours.
5
Remove each bar from the mold. Gently reheat the leftover soap in the microwave using 20 second bursts and pour it into each mold cavity. Wrap each bar in plastic wrap to prevent glycerin dew. Enjoy!
Tutorial credits
Photographer: Amanda Kerzman