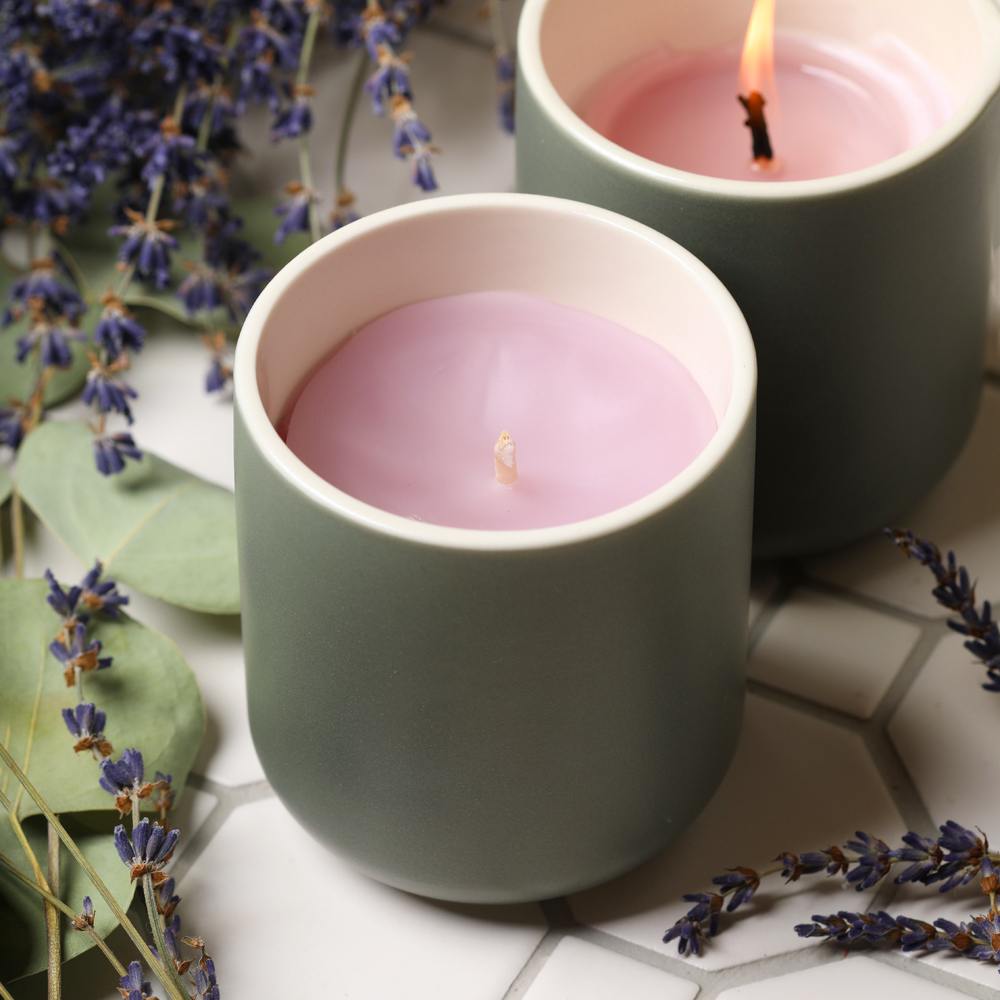
Peaceful Lavender Candle Project
Lavender is well-known for its relaxing scent. We added it to these beeswax candles to create a calming atmosphere. Violet Purple Candle Dye Flakes complement the scent perfectly.
Beeswax has a high melting point and requires a larger wick. To help get an even burn pool, we recommend lighting this candle for 2-3 hours at a time. In our tests, the HTP 1212 wick worked well. It may not produce a complete burn pool the first time, but eventually the insulation from the container will help it reach the edges. If you prefer soy wax, we found the HTP 93 wicks work well for the small ceramic containers.
What You Need:

Gray Ceramic Jar - Small - 4 Jars

HTP 1212 Wick - 10 wicks

Violet Purple Candle Dye Flakes - 1 oz

Peaceful Lavender Fragrance Oil - 4 oz

Premium White Beeswax - 1 lb

Wick Stickers - 10 Sheets (100 Stickers)
Recipe
INGREDIENTS:
- Violet Purple Candle Dye Flakes - 1 oz
- Peaceful Lavender Fragrance Oil - 4 oz
- Premium White Beeswax - 1 lb
- Wick Stickers - 10 Sheets (100 Stickers)
EQUIPMENT:
- Gray Ceramic Jar - Small - 4 Jars
- HTP 1212 Wick - 10 wicks
Instructions

You will need:
- 4 Small Gray Ceramic Jars
- 28 oz. White Beeswax
- 4 HTP 1212 Wicks
- Wick Stickers
- 2.8 oz. Peaceful Lavender Fragrance Oil
- Violet Purple Candle Dye Flakes
NOTE: You can melt beeswax a few different ways – we recommend using a double boiler. It’s possible in the microwave, but because beeswax has a high melting point, it takes a long time. The container needs to be very heat resistant so it won’t break.
PREPARE DOUBLE BOILER: Fill a large pot about a quarter full and place a heat-safe container on it. The container needs to be about the same diameter as the pot. Turn the heat to high until the water boils, then reduce to medium to maintain a soft boil.
Follow these steps:
1
Add 28 ounces of white beeswax to the heat-safe container. Allow the wax to melt slowly and not go above 180° F. Tip: This process can take a while depending on your melting setup. We recommend staying close to your container and stirring the beeswax every now and then to help it melt evenly.
2
Once the beeswax is completely melted, add a few of the Violet Purple Candle Dye Flakes. A little goes a long way, so start with 2-3 flakes and add more based on your preference. Stir to fully combine the wax and color.
3
Turn off the double boiler and remove the container. Set it aside and allow the wax to cool to about 160-165° F.
4
Add 2.8 ounces of Peaceful Lavender Fragrance Oil and stir gently for 1-2 minutes.
5
Allow the wax to cool to 155-160° F. Place wick stickers to the bottom of the wicks and place in the center of each jar. Pour the wax into each container, leaving enough room to put on the lid.
6
Allow the candles to fully cool and harden. Trim the wick. Light and enjoy! Note: We recommend allowing this candle to burn for 2-3 hours at a time to reach a full burn pool. It may not the first time it's lit. However, as the candle burns down and the flame becomes insulated by the candle container, it reaches a full burn pool.
Tutorial credits
Photographer: Amanda Kerzman
Peaceful Lavender Candle Project
- LEVEL Beginner
- TIME 1 hour
- YIELD 4 candles
Project Description
Lavender is well-known for its relaxing scent. We added it to these beeswax candles to create a calming atmosphere. Violet Purple Candle Dye Flakes complement the scent perfectly.
Beeswax has a high melting point and requires a larger wick. To help get an even burn pool, we recommend lighting this candle for 2-3 hours at a time. In our tests, the HTP 1212 wick worked well. It may not produce a complete burn pool the first time, but eventually the insulation from the container will help it reach the edges. If you prefer soy wax, we found the HTP 93 wicks work well for the small ceramic containers.
You will need:
- 4 Small Gray Ceramic Jars
- 28 oz. White Beeswax
- 4 HTP 1212 Wicks
- Wick Stickers
- 2.8 oz. Peaceful Lavender Fragrance Oil
- Violet Purple Candle Dye Flakes
NOTE: You can melt beeswax a few different ways – we recommend using a double boiler. It’s possible in the microwave, but because beeswax has a high melting point, it takes a long time. The container needs to be very heat resistant so it won’t break.
PREPARE DOUBLE BOILER: Fill a large pot about a quarter full and place a heat-safe container on it. The container needs to be about the same diameter as the pot. Turn the heat to high until the water boils, then reduce to medium to maintain a soft boil.
Follow these steps:
1
Add 28 ounces of white beeswax to the heat-safe container. Allow the wax to melt slowly and not go above 180° F. Tip: This process can take a while depending on your melting setup. We recommend staying close to your container and stirring the beeswax every now and then to help it melt evenly.
2
Once the beeswax is completely melted, add a few of the Violet Purple Candle Dye Flakes. A little goes a long way, so start with 2-3 flakes and add more based on your preference. Stir to fully combine the wax and color.
3
Turn off the double boiler and remove the container. Set it aside and allow the wax to cool to about 160-165° F.
4
Add 2.8 ounces of Peaceful Lavender Fragrance Oil and stir gently for 1-2 minutes.
5
Allow the wax to cool to 155-160° F. Place wick stickers to the bottom of the wicks and place in the center of each jar. Pour the wax into each container, leaving enough room to put on the lid.
6
Allow the candles to fully cool and harden. Trim the wick. Light and enjoy! Note: We recommend allowing this candle to burn for 2-3 hours at a time to reach a full burn pool. It may not the first time it's lit. However, as the candle burns down and the flame becomes insulated by the candle container, it reaches a full burn pool.
Tutorial credits
Photographer: Amanda Kerzman