Eclipse Soap Project
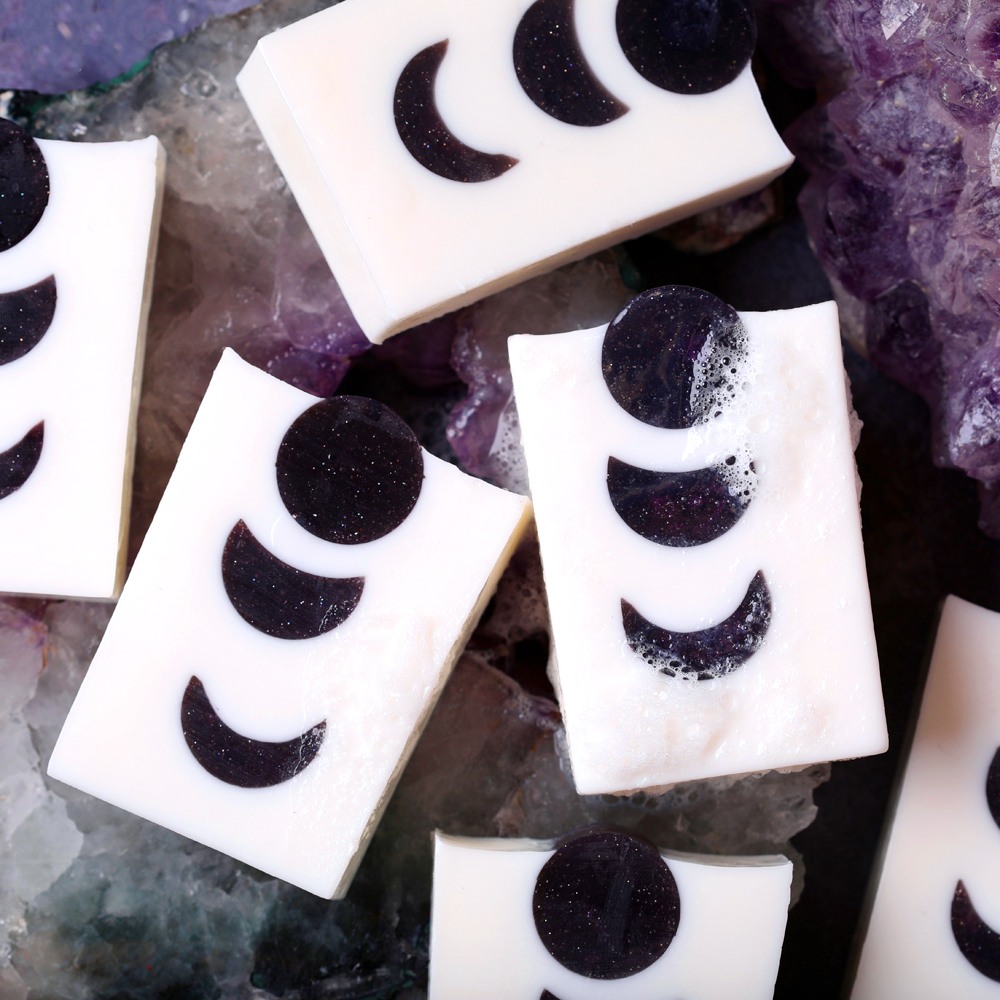
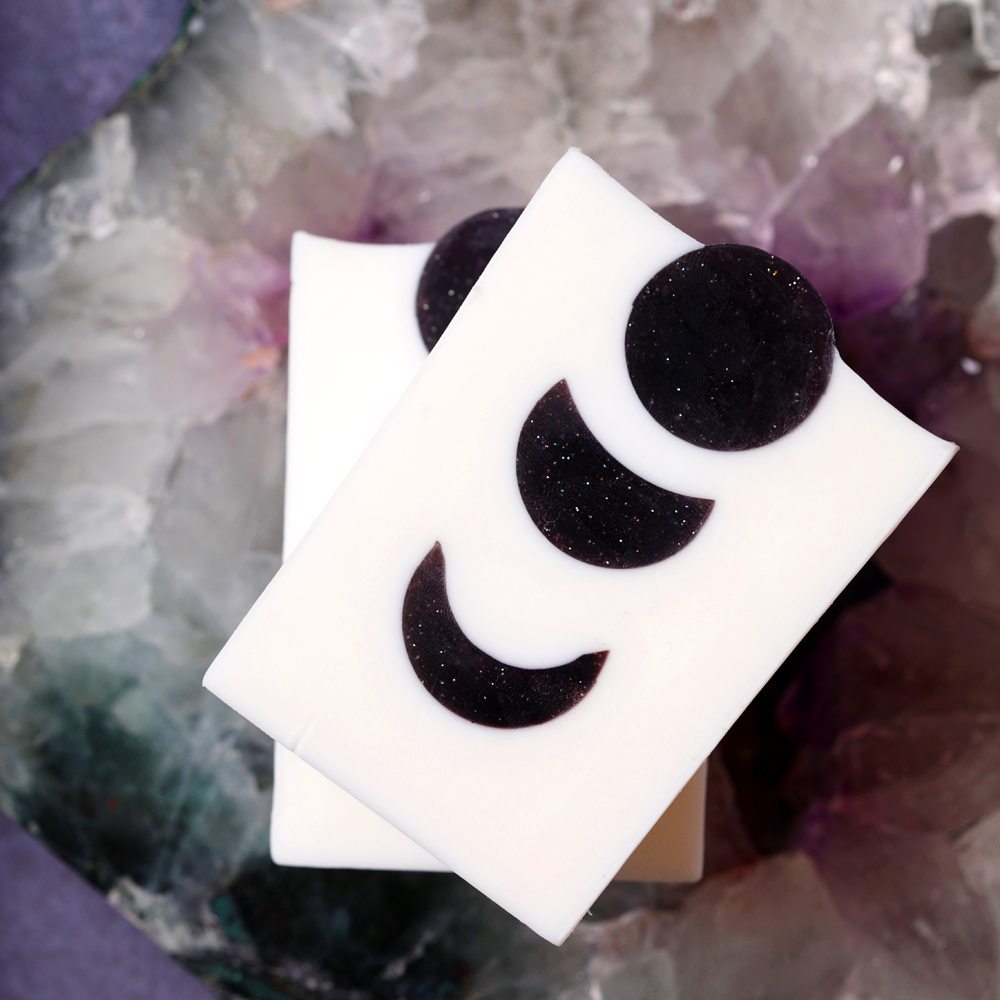
This Eclipse Soap is created by layering multiple embeds into the Tall 12" Silicone Loaf Mold. One of the moon embeds is carved into a thinner shape to create the appearance of an eclipse. We found the Clean Up Tool came in handy during this process, but a small spoon was best to smooth out the shape.
We scented this batch with Moon Child Fragrance Oil. It's a fresh scent with notes of white tea, thyme, tuberose, and honey. It complements the mystical eclipse design perfectly!
Because this project involves a lot of layering with melt and pour, we recommend having a few tools handy. It's important to spray with 99% isopropyl alcohol between each layer to help them stick together. You also need to be aware of the temperature of the soap, so an infrared thermometer is good to have. We recommend pouring the soap when it's 130-140° F so it doesn't melt the embeds. Patience is also key - this project requires waiting between each layer, but the end result is worth it!
What You Need:
Recipe
INGREDIENTS:
- Moon Child Fragrance Oil - 1.75 oz
- Blackberry Color Block - 1 Block
- Fine Silver Rainbow EcoGlitter - 1 oz
- SFIC Clear Melt And Pour Soap Base - 1 lb
- SFIC White Melt And Pour Soap Base - 1 lb
EQUIPMENT:
- Mini Moon Silicone Column Mold
- Mini Round Silicone Column Mold
- Tall 12 Silicone Loaf Mold
Instructions
You will need:
- Tall 12" Silicone Loaf Mold
- Mini Moon Silicone Loaf Mold
- Mini Round Silicone Column Mold
- 45 oz. White Melt and Pour Soap Base
- 16 oz. Clear Melt and Pour Soap Base
- Blackberry Color Block
- 1/4 tsp. Fine Silver Rainbow EcoGlitter
- 1.2 oz. Moon Child Fragrance Oil
- 99% Isopropyl Alcohol in a Spray Bottle
Follow these steps:
1
Cut 16 ounces of Clear Melt and Pour Soap Base into small uniform chunks. Place the soap into a heat-safe container along with a small chunk of the Blackberry Color Block and melt using 30 second bursts. Once completely melted, 1/4 teaspoon Fine Silver Rainbow EcoGlitter. Mix into the soap thoroughly until there are no chunks of EcoGlitter. Note: This project was originally made with the Plum Dusk Color Block, which has been discontinued. The Blackberry Color Block will create a similar shade but may vary from the photos.
2
Place the Mini Moon and Mini Round molds into a tall container to keep them upright. Pour the soap into the mold. Set the remaining soap aside for the third embed. Allow the soap in the mold to fully cool and harden. Remove the embeds and trim off any imperfections. Reheat and pour the remaining purple soap into the Mini Moon Silicone Column Mold and allow to harden. Remove from the mold and trim any imperfections. Tip: You can place the soap in the fridge to help speed up the cooling process. If you live in a humid area, this can increase the chance of glycerin dew.
3
Using a small spoon, carve one of the moon embeds into a thinner moon. Do your best to make it smooth and even throughout. Set all the embeds aside. Tip: We found the Clean Up Tool to be helpful during this process, but a small spoon worked best to create a smooth and even moon shape.
4
Chop 45 ounces of White Melt and Pour Soap Base into small uniform pieces. Place it into a heat-safe container and melt using 30-60 second bursts. Once completely melted, stir in 1.2 ounces of Moon Child Fragrance Oil. Then, pour a thin layer of white soap into the mold. Spray with alcohol to get rid of bubbles and allow to harden.
5
If necessary, reheat the white soap in the microwave using 15-20 second bursts. Pour a small amount of white soap into the mold, spray with alcohol, and insert the thin moon into the wet soap facing up. Spray with alcohol and pour more white soap until the moon is completely covered and there's a small layer of white soap on top of the embed. Allow to cool and harden. Tip: When layering embeds in melt and pour soap, make sure the soap is about 130-140° F. If the soap is too hot, it can melt the embeds.
6
Reheat the white soap in the microwave using 15-20 second bursts. Pour a small amount of white soap into the mold, spray with alcohol, and insert the other moon embed into the wet soap facing up. Spray with alcohol and pour more white soap until the moon is completely covered and there's a small layer of white soap on top of the embed. Allow to cool and harden.
7
Reheat the white soap in the microwave using 15-20 second bursts. Pour a small amount of white soap into the mold, spray with alcohol, and insert the circle embed into the wet soap. Spray with alcohol and pour more white soap on both sides of the circle embed. It won't be completely covered. Spray with alcohol to get rid of bubbles. Allow to fully cool and harden for at least 3 hours or up to overnight.
8
Once completely cooled and hardened, remove them from the mold and enjoy. To help prevent glycerin dew, wrap the soap in plastic wrap. Enjoy! Tip: We have found layers stay together better when you cut the soap from the side, instead of from the top down.
Tutorial credits
Photographer: Amanda Kerzman

Eclipse Soap Project
- LEVEL Advanced
- TIME 2 hours
- YIELD About 3 pounds of soap
Project Description
This Eclipse Soap is created by layering multiple embeds into the Tall 12" Silicone Loaf Mold. One of the moon embeds is carved into a thinner shape to create the appearance of an eclipse. We found the Clean Up Tool came in handy during this process, but a small spoon was best to smooth out the shape.
We scented this batch with Moon Child Fragrance Oil. It's a fresh scent with notes of white tea, thyme, tuberose, and honey. It complements the mystical eclipse design perfectly!
Because this project involves a lot of layering with melt and pour, we recommend having a few tools handy. It's important to spray with 99% isopropyl alcohol between each layer to help them stick together. You also need to be aware of the temperature of the soap, so an infrared thermometer is good to have. We recommend pouring the soap when it's 130-140° F so it doesn't melt the embeds. Patience is also key - this project requires waiting between each layer, but the end result is worth it!
You will need:
- Tall 12" Silicone Loaf Mold
- Mini Moon Silicone Loaf Mold
- Mini Round Silicone Column Mold
- 45 oz. White Melt and Pour Soap Base
- 16 oz. Clear Melt and Pour Soap Base
- Blackberry Color Block
- 1/4 tsp. Fine Silver Rainbow EcoGlitter
- 1.2 oz. Moon Child Fragrance Oil
- 99% Isopropyl Alcohol in a Spray Bottle
Follow these steps:
1
Cut 16 ounces of Clear Melt and Pour Soap Base into small uniform chunks. Place the soap into a heat-safe container along with a small chunk of the Blackberry Color Block and melt using 30 second bursts. Once completely melted, 1/4 teaspoon Fine Silver Rainbow EcoGlitter. Mix into the soap thoroughly until there are no chunks of EcoGlitter. Note: This project was originally made with the Plum Dusk Color Block, which has been discontinued. The Blackberry Color Block will create a similar shade but may vary from the photos.
2
Place the Mini Moon and Mini Round molds into a tall container to keep them upright. Pour the soap into the mold. Set the remaining soap aside for the third embed. Allow the soap in the mold to fully cool and harden. Remove the embeds and trim off any imperfections. Reheat and pour the remaining purple soap into the Mini Moon Silicone Column Mold and allow to harden. Remove from the mold and trim any imperfections. Tip: You can place the soap in the fridge to help speed up the cooling process. If you live in a humid area, this can increase the chance of glycerin dew.
3
Using a small spoon, carve one of the moon embeds into a thinner moon. Do your best to make it smooth and even throughout. Set all the embeds aside. Tip: We found the Clean Up Tool to be helpful during this process, but a small spoon worked best to create a smooth and even moon shape.
4
Chop 45 ounces of White Melt and Pour Soap Base into small uniform pieces. Place it into a heat-safe container and melt using 30-60 second bursts. Once completely melted, stir in 1.2 ounces of Moon Child Fragrance Oil. Then, pour a thin layer of white soap into the mold. Spray with alcohol to get rid of bubbles and allow to harden.
5
If necessary, reheat the white soap in the microwave using 15-20 second bursts. Pour a small amount of white soap into the mold, spray with alcohol, and insert the thin moon into the wet soap facing up. Spray with alcohol and pour more white soap until the moon is completely covered and there's a small layer of white soap on top of the embed. Allow to cool and harden. Tip: When layering embeds in melt and pour soap, make sure the soap is about 130-140° F. If the soap is too hot, it can melt the embeds.
6
Reheat the white soap in the microwave using 15-20 second bursts. Pour a small amount of white soap into the mold, spray with alcohol, and insert the other moon embed into the wet soap facing up. Spray with alcohol and pour more white soap until the moon is completely covered and there's a small layer of white soap on top of the embed. Allow to cool and harden.
7
Reheat the white soap in the microwave using 15-20 second bursts. Pour a small amount of white soap into the mold, spray with alcohol, and insert the circle embed into the wet soap. Spray with alcohol and pour more white soap on both sides of the circle embed. It won't be completely covered. Spray with alcohol to get rid of bubbles. Allow to fully cool and harden for at least 3 hours or up to overnight.
8
Once completely cooled and hardened, remove them from the mold and enjoy. To help prevent glycerin dew, wrap the soap in plastic wrap. Enjoy! Tip: We have found layers stay together better when you cut the soap from the side, instead of from the top down.
Tutorial credits
Photographer: Amanda Kerzman


